
Fabrication at The Design + Technology Lab
The recording above shows how we’ll use the Design + Technology Lab to produce 6″ x 6″ image + symbol tiles. We’ll use two pieces of technology: the UV Flatbed Printer (prints the photo side of the plate) and the laser cutter (cuts the tile and etches in your symbol).
Step 1: Prepare your Illustrator laser cutter file (symbol, cut lines)
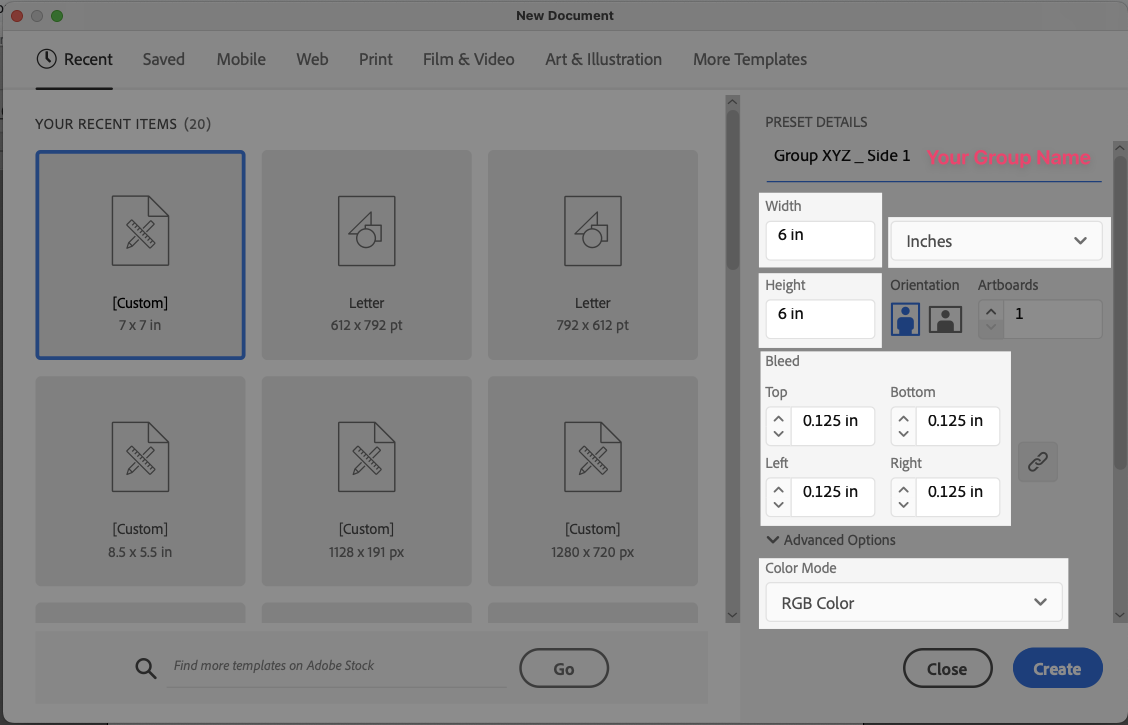
The recorded workshop above walks you through how to use Adobe illustrator, but please use these settings when you create your new document (they are slightly different than what is in the recording, but this is OK!).
Please confirm all settings before you create your design. Be warned: files that do not meet these specifications may not be printable!
Step 2: Prepare your Photoshop UV printer file (photo)
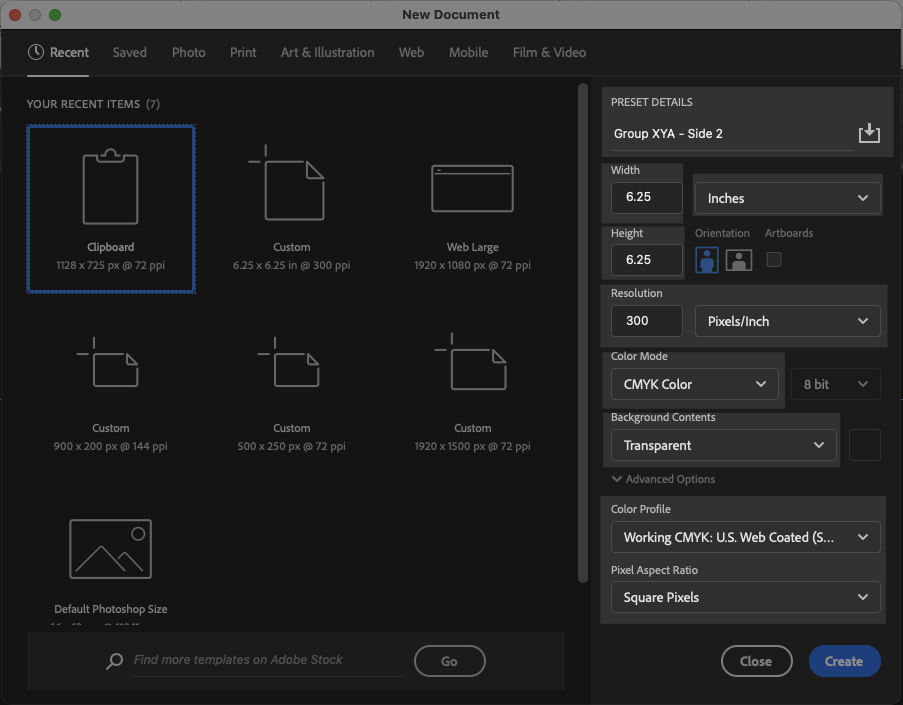
The recorded workshop above walks you through how to use Adobe Photoshop, but please use these settings when you create your new document (they are slightly different than what is in the recording, but this is OK!).
Please confirm all settings before you create your design.
Step 3:
A group member should submit your .ai and .psd work files (one for each side of the tile) to procomtech@torontomu.ca, CC’ing your instructor. This permits staff to undertake a technical review of all files before they are printed at the D+TL and paid for in full by ProCom. Please do not leave this to the last minute — it is very common in the printing industry for designers to make some minor adjustments to a file before the printer can print it.
Next steps: ProCom and DTL staff will combine the class tiles into a single composite printed out in one ”run.” The tiles will then be printed all at once. We’ll email you when the tiles are ready. You’ll need to meet with us to fill the etched symbols with high-contrast paint (provided).